Nadia vs. Tarte Tatin

Sharing is caringShare on FacebookTweet about this on TwitterPin on PinterestShare on Google+Share on Tumblr

Now, I am known for baking until late, late at night. Baking and frosting cupcakes at 2am? No problem. Decorating cookies with royal icing at 3am? Bring it on. But if I am not one thing, that is an early bird.  So why did I end up waking at 6am to make a tarte tatin? Still a mystery to me too. Although it may have to do with the fact that I cannot miss a baking challenge and when my co-workers said I should make this dessert, I didn’t realize it’s best served warm. That is one mistake I will not be making hastily again: before promising another fiddly bake, I will check if it can be baked the day/night before.

So I set on to finding the best recipe. The New York Times promised theirs is fool proof but it used ready puff pastry (and I like to make my own pastry). BBC Good Food didn’t make any empty promises but it did sound like more work than the NY times one. So as one does, I combined the 2 recipes to produce the famous apple tart and here we go:

Tarte tatin
(makes one 10-11 inch tart – please note it takes a while to prepare if you do it ‘by the book’ and let the apples dry overnight in the fridge)
IMG_7070

Ingredients for the filling:
6 large apples (I used Braeburn but apparently you can use Granny Smith mixed with Cox or Honeycrisp) – just make sure they’re firm so they don’t fall apart while cooking
80g salted butter
100-130g light brown sugar (to taste)

Ingredients for the pastry:
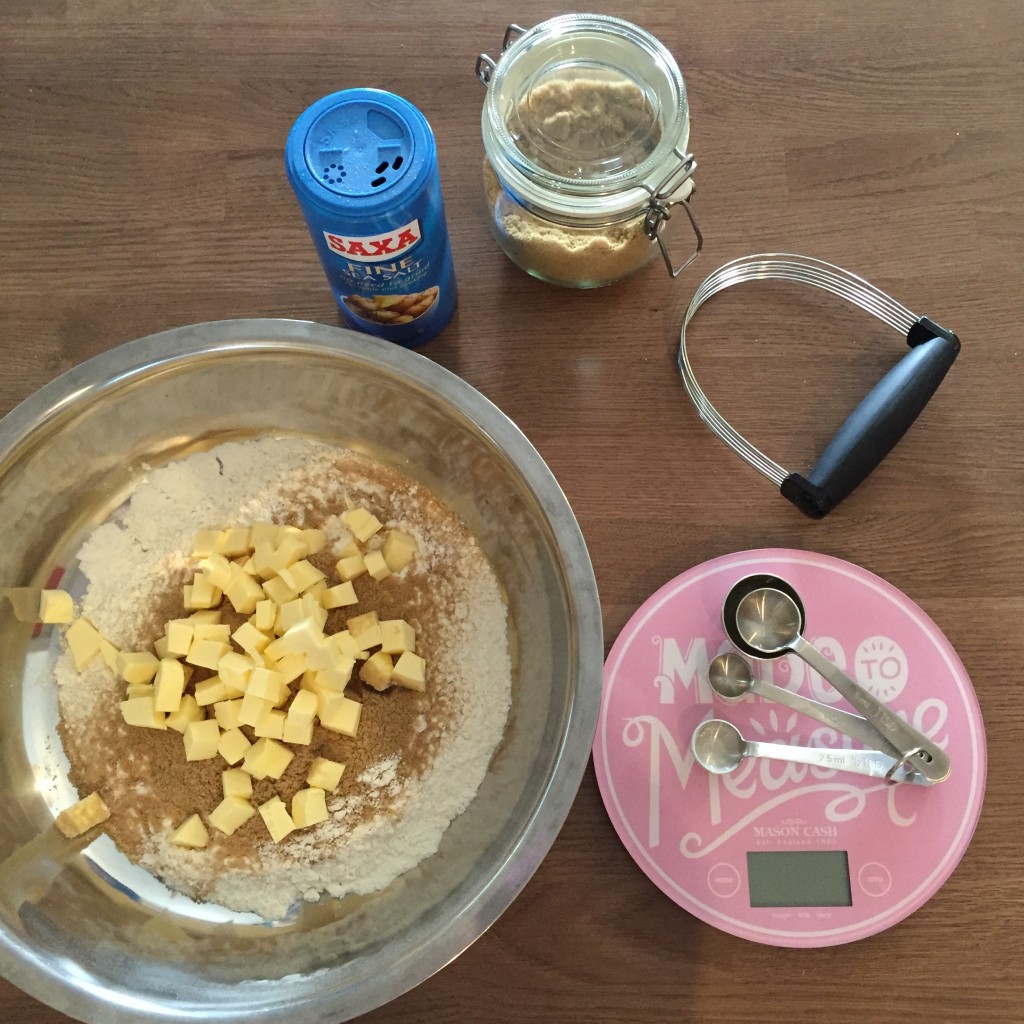
250 g plain flour*
50 g soft light brown sugar
A pinch of salt
125 g unsalted cold butter
1 large free-range egg

*You can make the tart gluten free if you replace the regular flour with a GF one and add ½ teaspoon xanthan gum)
IMG_7081
Method:

I like to prepare my pastry in advance. So let’s start with that. Sieve the flour (and xanthan gum if going GF) into a large bowl (the shallower, the better), then stir in the sugar and salt. Cut the butter into cubes, then use your hands or a pastry blender to rub it into the flour mixture until it resembles fine breadcrumbs. Beat the egg in a separate bowl, then add it to the mixture. Use your hands to bring it together into a rough dough, but don’t knead it too much. If for some reason the dough is too crumbly, you can add some milk on order to bring it all together but mine came out fine with just the egg, in fact it was still a little sticky which is totally fine since you will be using a little flour later when rolling it out to prevent it from sticking to your worktop and rolling pin. Form the dough into a flat round, roughly 2.5cm thick, wrap in cling film and let sit fridge for about 30 minutes to an hour before rolling it out.

Slice the apples and place in the fridge for a few hours (ideally overnight so they can dry up a little bit). You can add some lemon juice to prevent them from browning but they will go brown when cooking anyways so you can skip the lemon juice.

IMG_7083

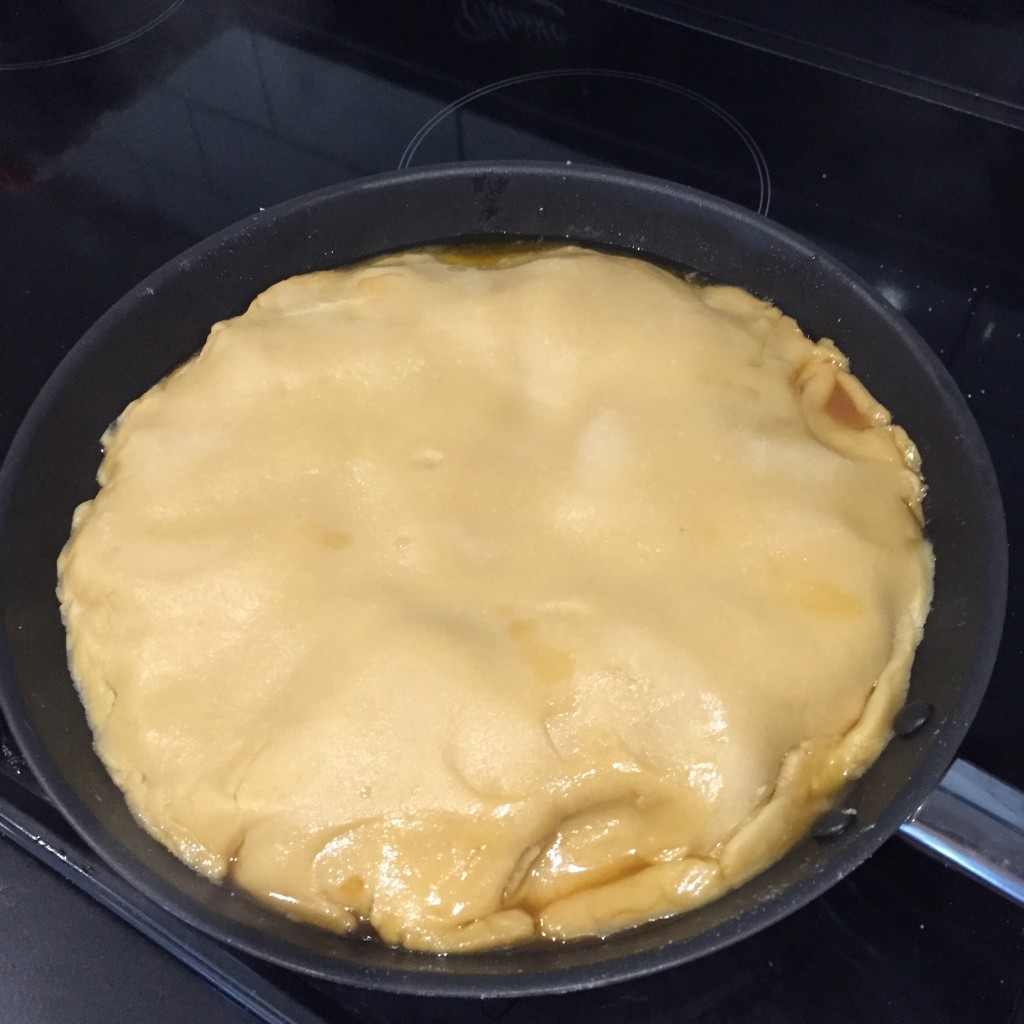
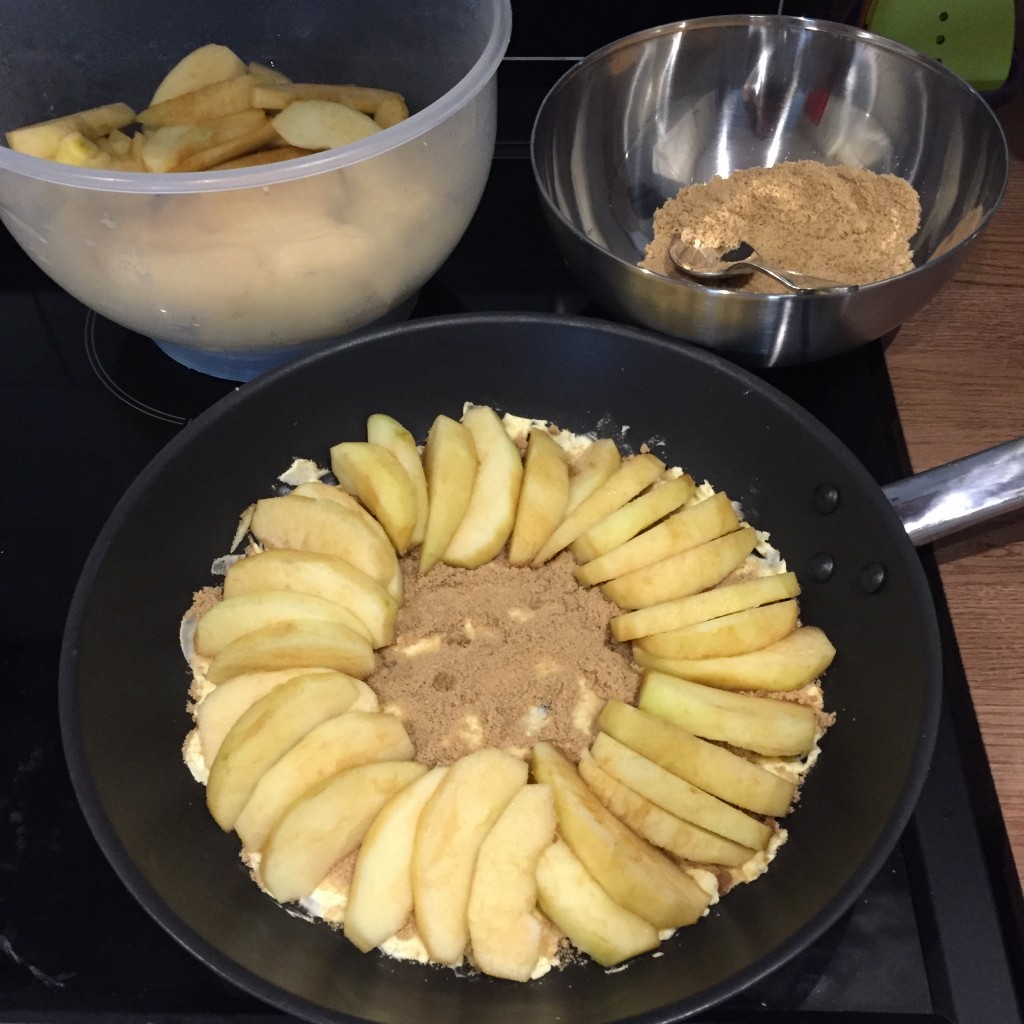
The next steps are ideally done right before you want to serve the tart. Cover an oven proof frying pan (I have an IKEA one which has a metal handle) with the butter (it needs to be a thick layer) and sprinkle most of the sugar over it and arrange the apples nicely on top, making sure the whole surface is covered. Add the rest of the sugar on top. Roll the pastry to the size of the pan and cover the apples. Place the pan on a medium to high heat on the hob. Cook for a few minutes until the juices around the edges of the pastry begin to bubble, and spoon some out of going over the pastry. Cook for another 10-15 minutes until the juice starts going darker and starts to caramelize. Then place the pan in a preheated fan oven at 170 degrees Celsius (or 180-190 if using a regular, non-fan oven). Bake for another 45-50 minutes.

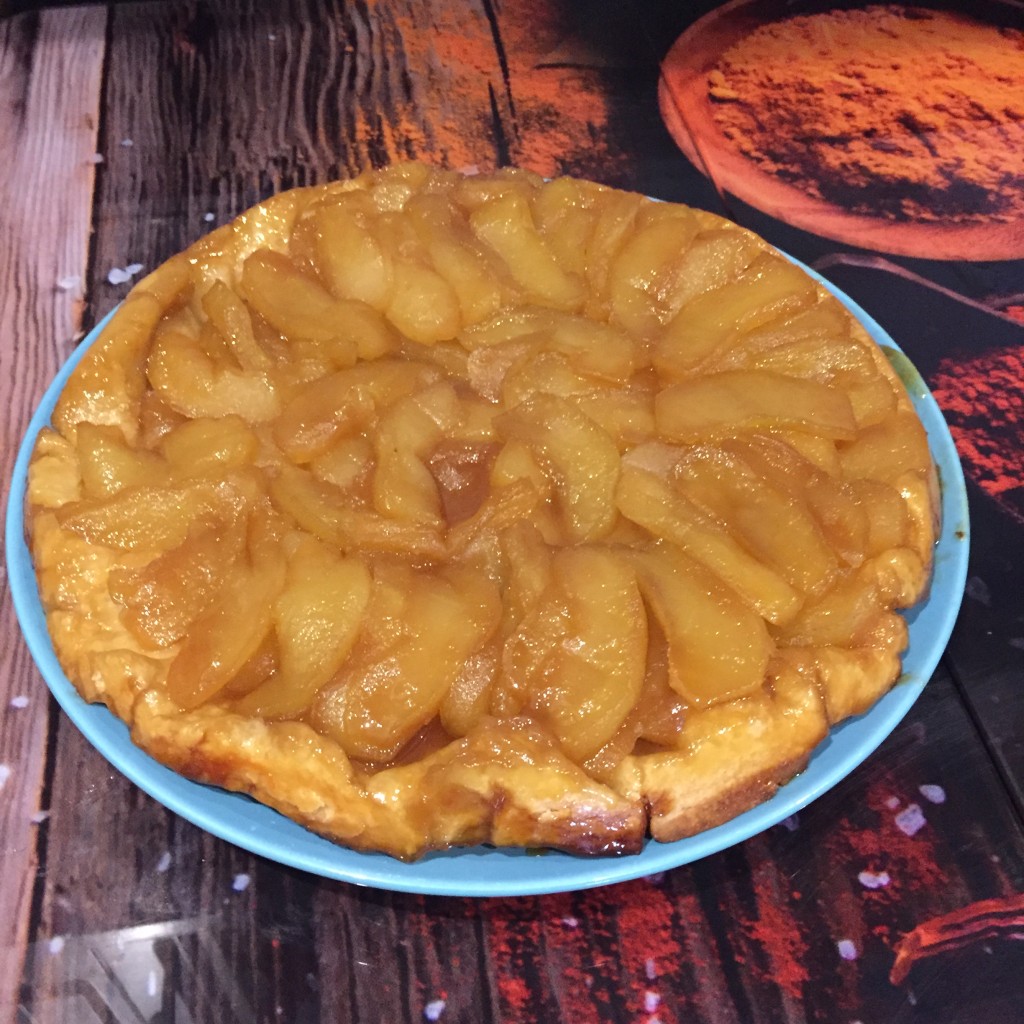
Let cool for a few minutes (around 5) once you take it out of the oven, then place a serving dish on top and carefully tip the tart over. Serve while still warm – add a scoop of vanilla ice cream or whipped cream if you like!

IMG_7085

Sharing is caringShare on FacebookTweet about this on TwitterPin on PinterestShare on Google+Share on Tumblr

Foreign eats

Sharing is caringShare on FacebookTweet about this on TwitterPin on PinterestShare on Google+Share on Tumblr

In December I spent a considerable time out of town visiting foreign, German speaking countries. And as a true baker, I was on a mission to sample local sweet delicacies in order to be able to report on them here, and no other reason. Honest.

So here we go, in order of appearance:

1. Chimney cake in Vienna, Austria
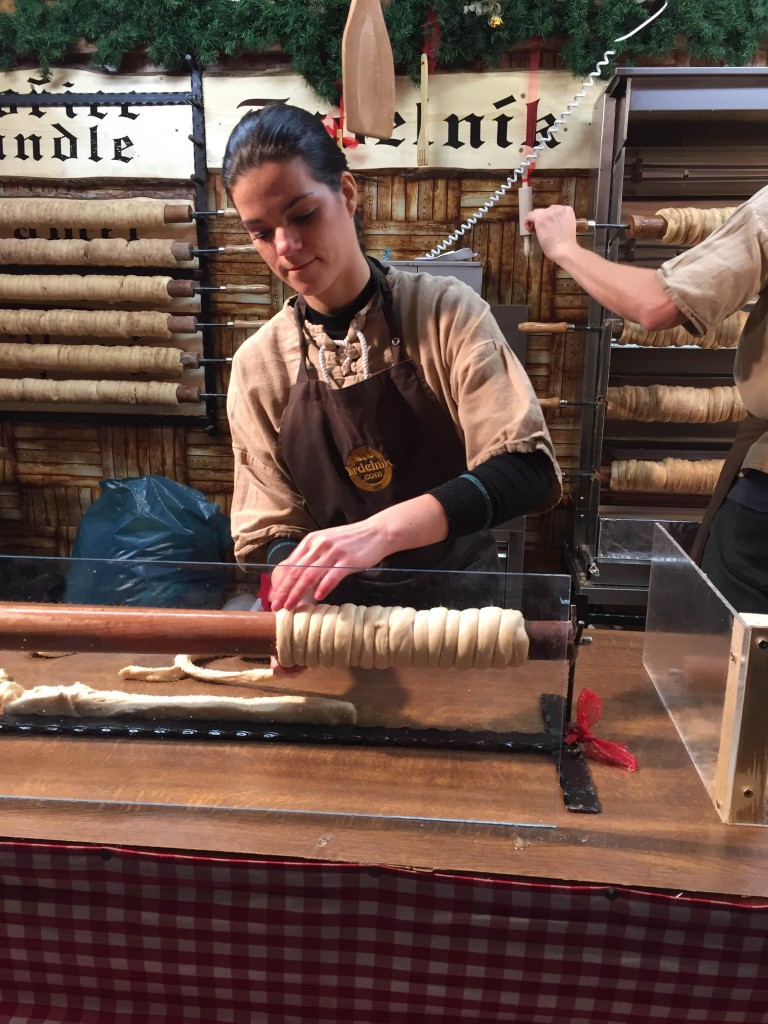
Although the Austrians have no claim over this cake, also known as Kürtőskalács, I am forever grateful that it features in their traditional Christmas Markets. It originates from Hungarian-speaking regions of Romania apparently and is a sweet yeast dough which they roll around a spit, dip in cinnamon sugar (but there are variations to the dips – they can contain nuts e.g.)  and bake in a rotisserie. For me, there are only a few things better than digging into some of this chimney cake while it’s still hot. It is divine – soft and fluffy on the inside and crunchy and caramelized on the outside. We discovered it early on and kept coming back. Tip: We decided to save some for breakfast one evening but I recommend you didn’t. It had gone hard so best eaten while still hot!

chimney cake

The dough is being rolled around the spit – rotisserie in the background

2. Kaiserschmarrn in Vienna, Austria
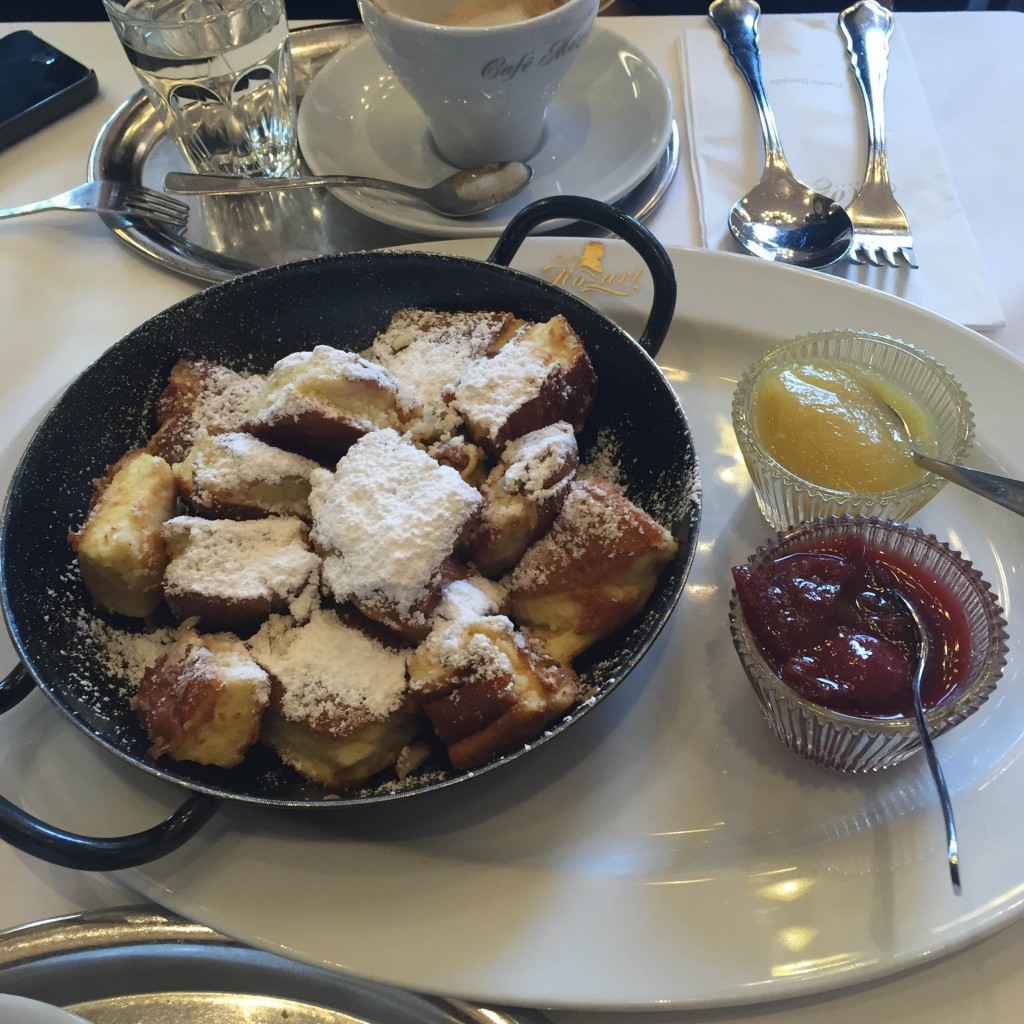
G insisted we had some Sachetorte in Vienna. I however, refuse to give any more attention to this plain chocolate cake as it is already getting way more than deserved. Anyways, the queue at the original Sacher Hotel was about 3 miles long and it was freezing cold outside, so we settled for Cafe Mozart just around the corner from it. We ordered some Sacher cake but I wanted him to try Kaiserschmarrn – this is a shredded thick pancake which can be served directly in the skillet, usually sprinkled with powdered sugar and accompanied by plum jam or apple sauce (we were lucky, or should I say paid enough to get both). But to best describe it – imagine an incredibly light and fluffy sponge cake prepared in a pan on the hob rather than in the oven. And the best part about it? It can be legitimately eaten as a main course in Austria, not just dessert. Win!

The Kaiserschmarrn in Cafe Mozart

The Kaiserschmarrn in Cafe Mozart

3. Bavarian Snowball in Speyer, Germany
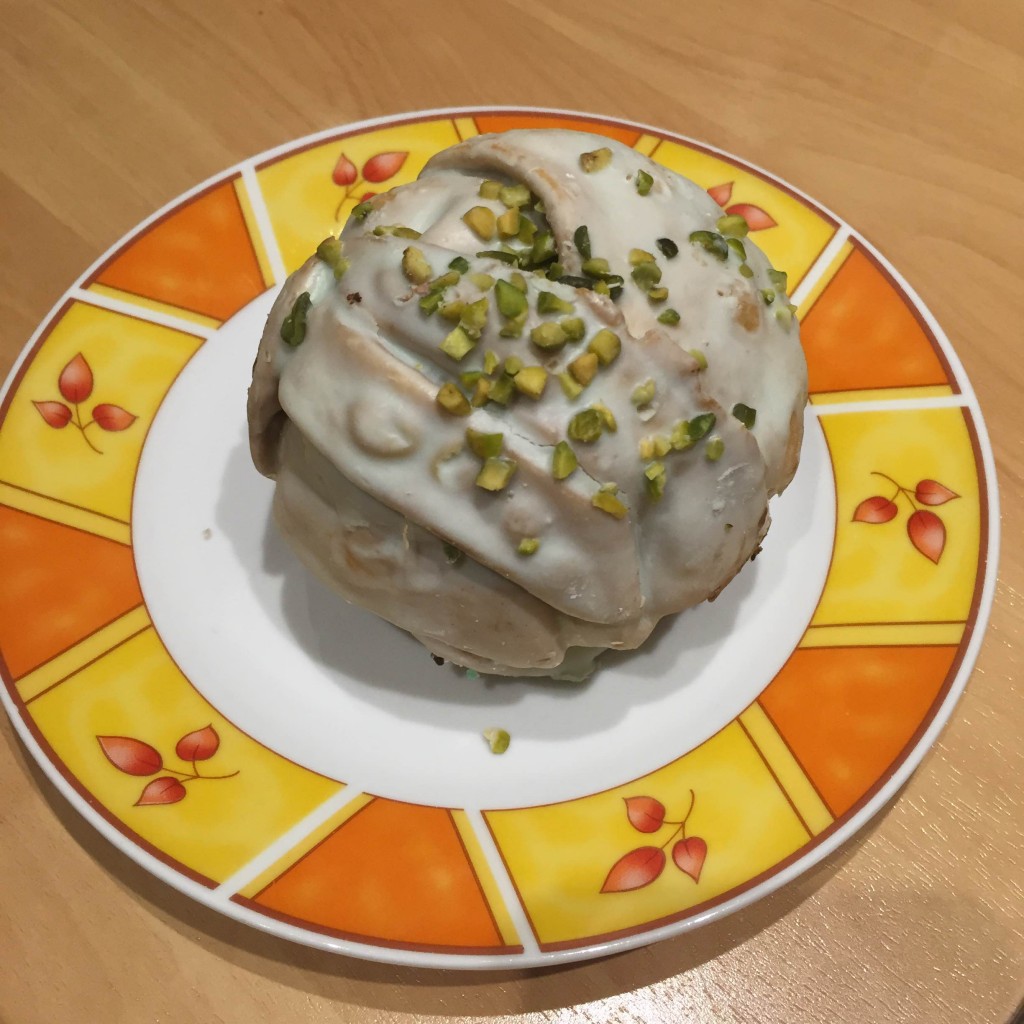
We didn’t actually go to Bavaria but they had Rothenburger Schneeballen (or Snowballs from Rothenburg) in Speyer, where we were spending Christmas. I just had to have one – it looked too good to miss out on. Turned out it’s nothing special – shortcrust pastry scrunched up in a ball, deep fried and sprinkled either with icing sugar or drizzled with glaze. I opted for a pistachio one and there seemed to be some green-ish looking paste in it but it didn’t taste to pistachios too much. I still recommend to try it but don’t expect to be wow-ed by it quite the same was by the chimney cake. It also makes a decent souvenir since it has a very long shelf life and looks better than a fridge magnet.

My pistachio Snowball

My pistachio Snowball

4. Black Forest Gâteau in the Black Forest, Germany
You must have heard of this cake before, also known as a Schwarzwälder Kirschtorte, which is pretty much chocolate sponge, whipped cream and cherries. It sound simple enough but it’s pretty delicious, especially if you soak the sponge in Kirschwasser, a clear cherry liqueur. So when I was told we were going to spend a few days in the Black Forest mountains, you can imagine what was on my mind – I need to try me some cherry cake from the place it actually comes from (or is at least named after – the history of this bake seems to be a little vague). But guess what – I didn’t actually have any for one reason or another. So I am unable to report on it – I did, however, think it important to mention I have at least been there. I did bring some vanilla Kirschwasser so may just make a Black Forest gâteau myself soon.

Do you also first think of trying the local desserts when you travel or do you have different priorities? I’d be curious to hear of any interesting desserts you have tried!

Sharing is caringShare on FacebookTweet about this on TwitterPin on PinterestShare on Google+Share on Tumblr

FETA & OLIVE SCONES [+RECIPE]

Sharing is caringShare on FacebookTweet about this on TwitterPin on PinterestShare on Google+Share on Tumblr

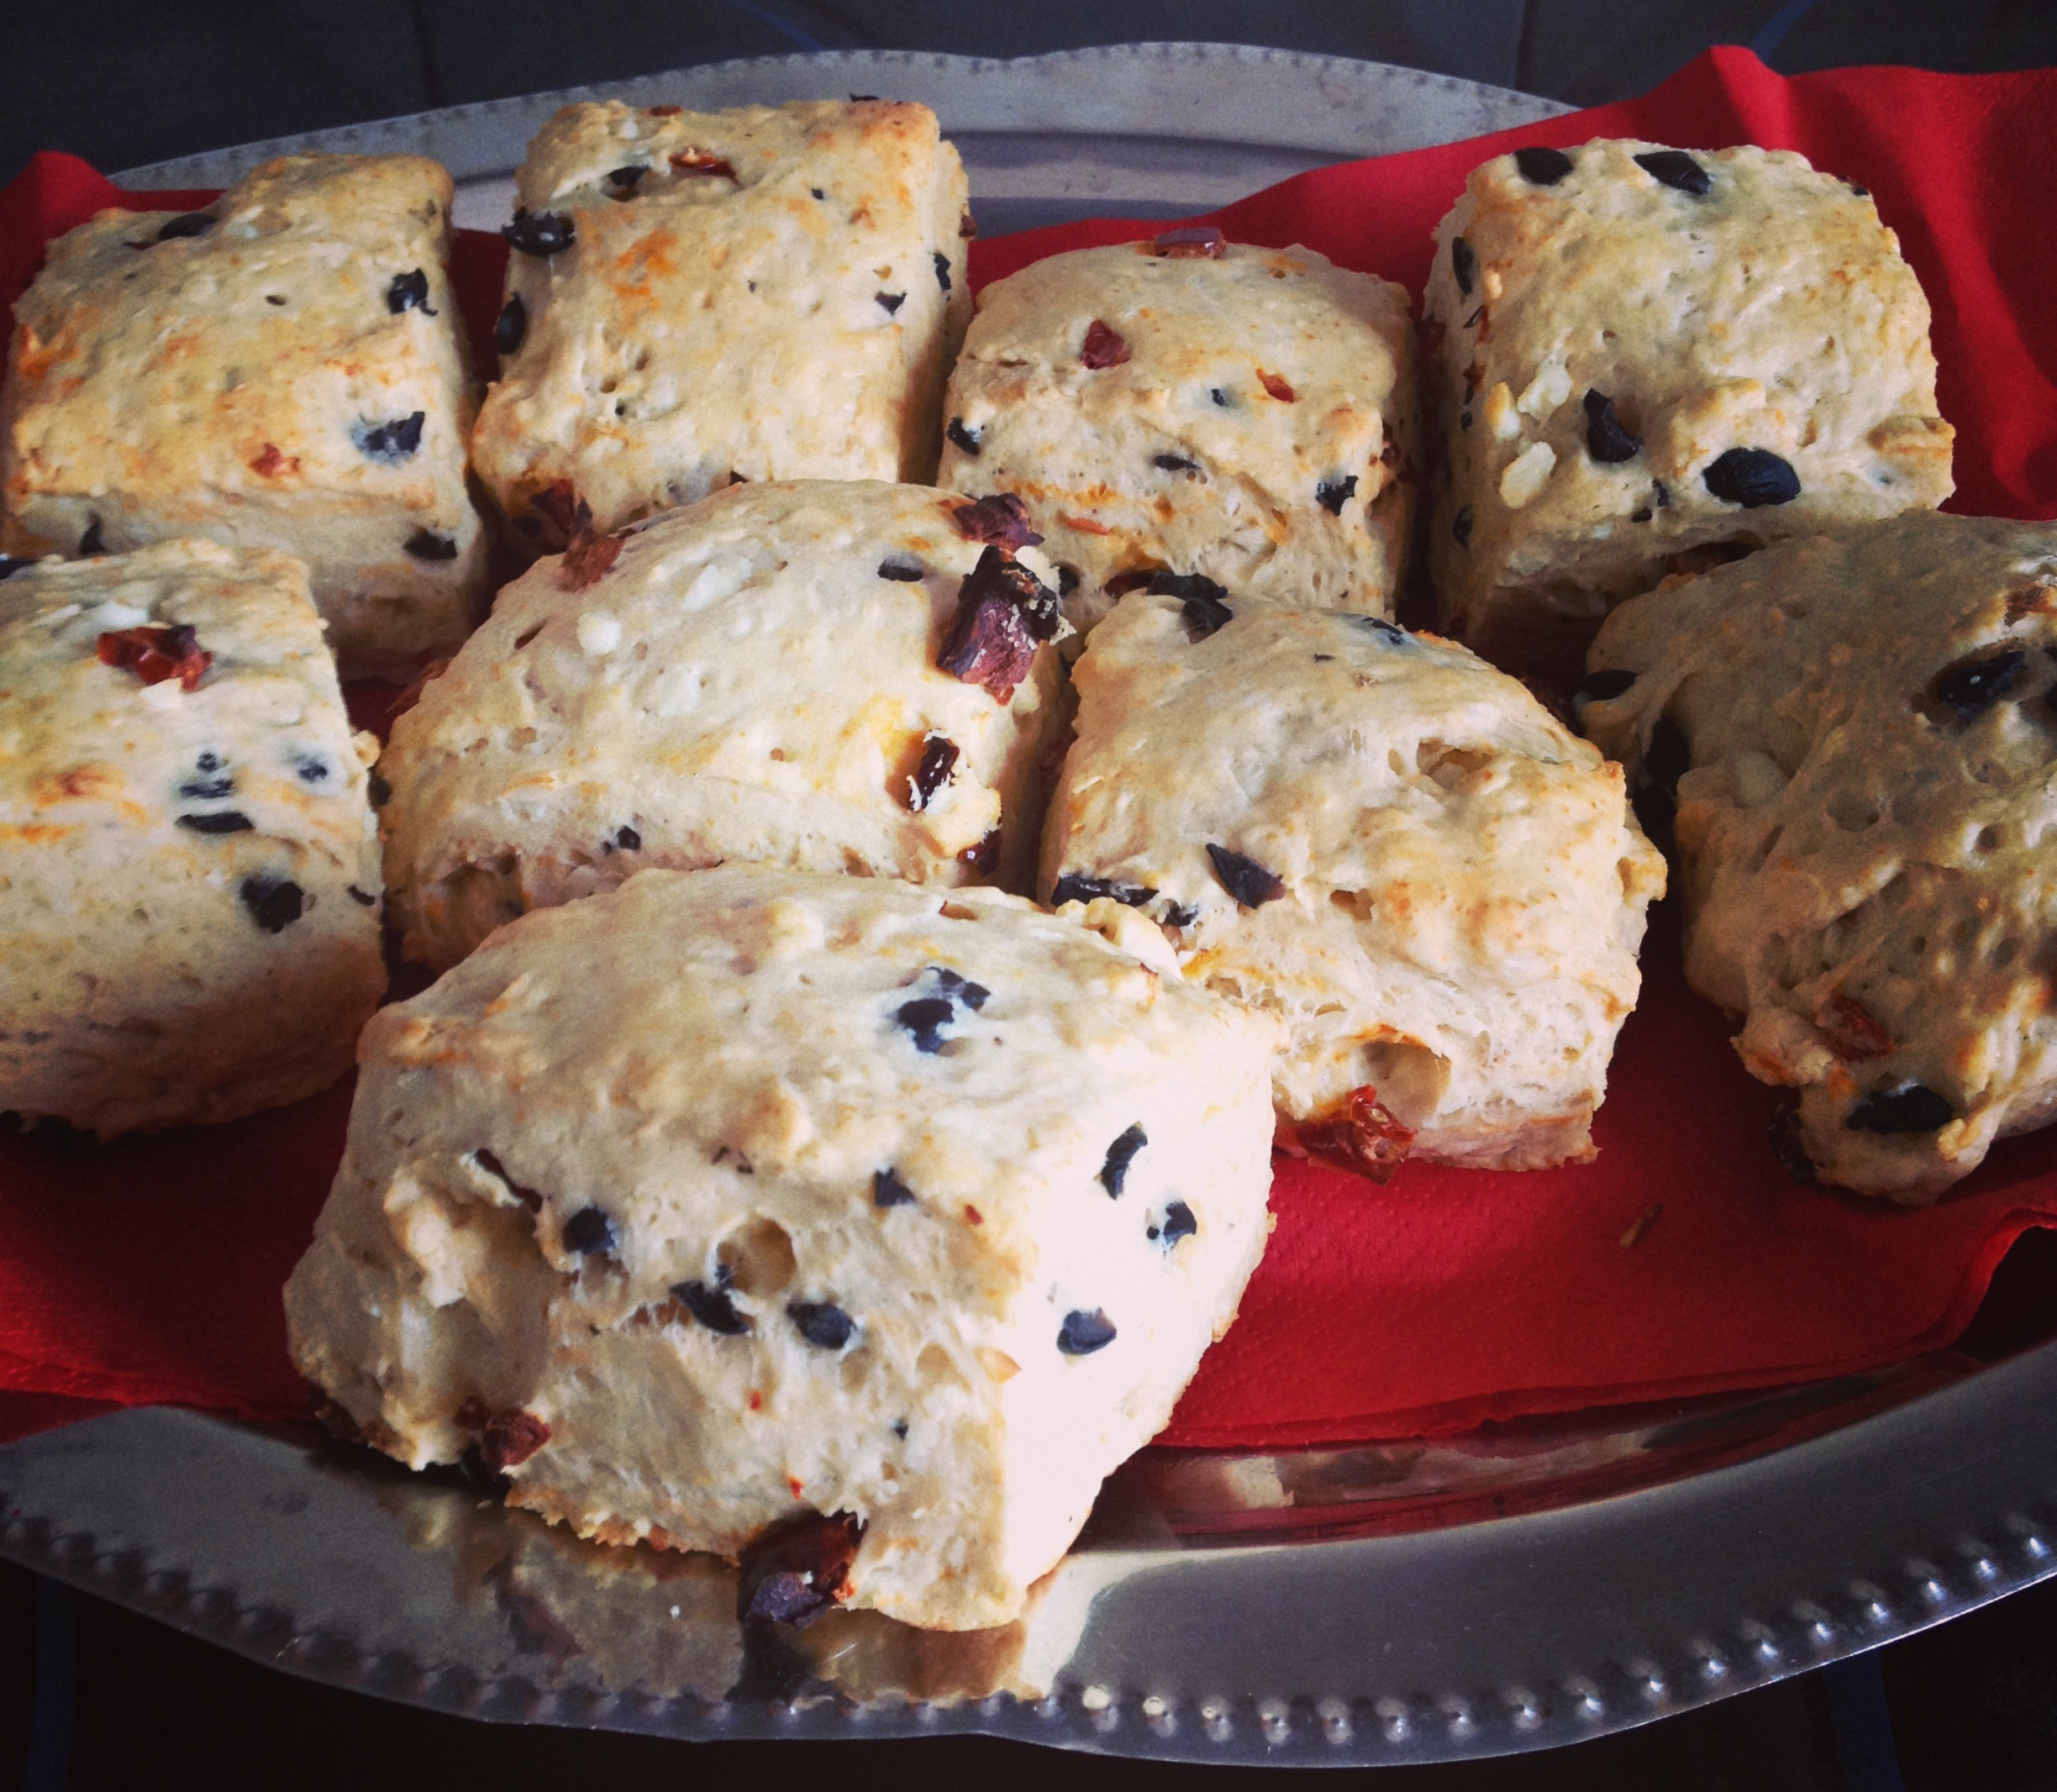
I’ve just popped the second and final batch of strawberry and white chocolate cupcakes in the oven and am contemplating a midnight-ish run to the supermarket (yes, it will be nearly 10pm by the time cupcakes are done, and yes, I am crazy but a supermarket kind of nearby now works till 12am so who am I to not take advantage of these new working hours, especially if I so thoughtfully forgot to buy the cheese for the frosting). And while the magic is happening in the oven and because I don’t want my dear readers to get diabetes from only reading my blog, I thought I’d share the result and recipe for my first (savory) attempt for scones. The recipe is courtesy of a Marks & Spencer’s baking cookbook and if you are lucky to have tried the Marks & Spencer’s food, you will know they know what they’re doing!

Feta & olive scones

Ingredients:

  • 400g self raising flour
  • 1/4 tsp salt
  • 85g butter at room temperature (+extra for greasing – optional)
  • 40g pitted black olives, chopped
  • 40g sun-dried tomatoes in oil, drained and chopped
  • 85g feta cheese, crumbled
  • 200ml milk + extra for glazing

Method:
First preheat your oven to 220 degrees Celsius. If you have a baking sheet, grease it with a little butter. If not, line a tray with baking parchment (no need to grease it) – I used the parchment and it works just fine.

Then sift the flour and salt in a large bowl. Now prepare to get messy: You need to add the soft butter to the flour and mix with your hands until it all looks like crumbs. The add the olives, feta cheese and tomatoes and mix it all.

Start adding the milk, a little at a time, while kneading the dough. Your hands would be pretty sticky at this point, so pre-measure it (or call someone, if available, to help) in order to avoid having to wash your hands a million times. You need to have a soft (and not too sticky) dough at the end so knead until then.

Roll out until you have a 3 cm thick sheet of dough – don’t worry, it won’t be all nice and smooth. Cut with round cutters or if you cannot be bothered like me, in squares, about 5-6 cm wide. Brush with milk, put on tray/baking sheet and bake for 12-15 minutes or until golden.

Serve warm with butter!

Feta & olive scones

Not bad for a first attempt at scones, eh? Also confirmed by the speed with which these (plus a few more) disappeared!

UPDATE: Don’t you just hate it when you go grocery shopping with a game plan, aka shopping list, with the (apparently false) security that you won’t forget anything because you have a list only to get home, start baking and realize you didn’t put everything you need on the list???

Also, clearly I am the last person to get the memo that said supermarket no longer works till midnight. Or was there no memo for going back to 10pm closing time despite them heavily advertising the new working hours? I guess I will never know. But fact is, I just walked nearly 40 minutes to it and back, crossed a rather windy runway twice and came back without Philadelphia cream cheese.

On a different note, the petrol stations in Gibraltar which open after 10pm have an extensive selection of butter (I counted 5 different types in only one of them), it seems, but do not stock any cream cheese.

Buttercream frosting it is then. *Sigh*

Sharing is caringShare on FacebookTweet about this on TwitterPin on PinterestShare on Google+Share on Tumblr